How to Make Square Photo (No Crop DP) for WhatsApp and Instagram
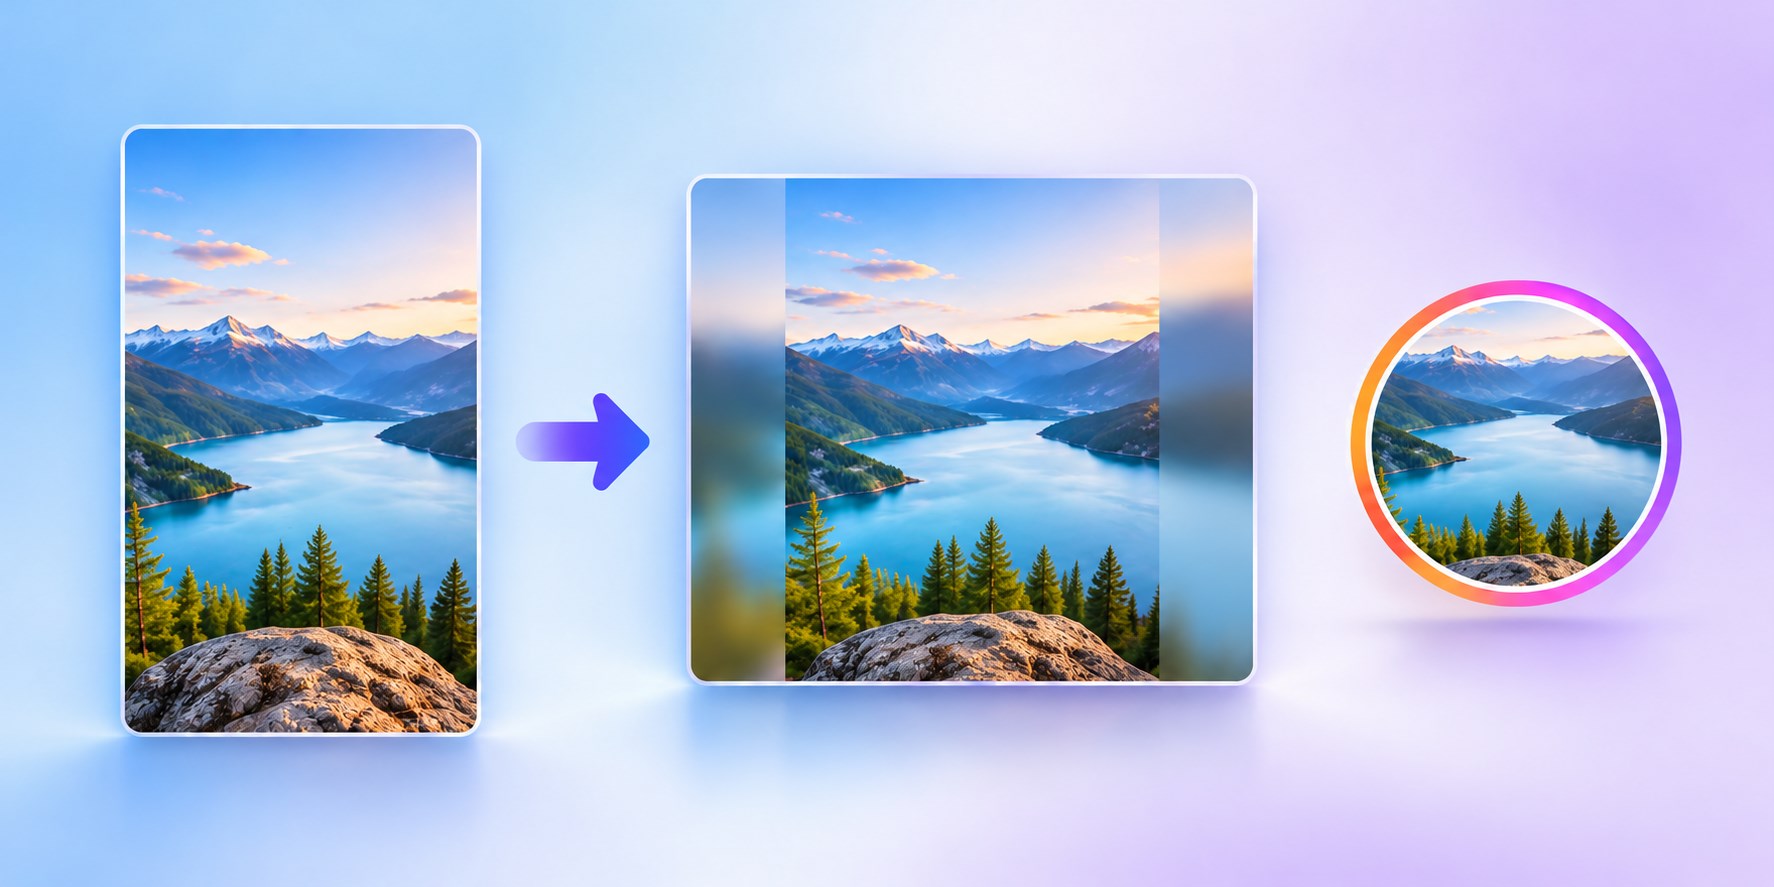
A portrait photo does not naturally fit a square frame. Neither does a wide landscape image. If you crop either one to a 1:1 aspect ratio, someone, something, or part of the background may disappear.
That is not your only option.
You can make a square photo or no crop DP by placing the complete picture inside a square canvas and filling the extra space with a blurred copy of the image or a solid color. The original photo remains visible from edge to edge, while the finished file has the 1:1 shape used for WhatsApp and Instagram profile pictures.
This guide explains how to do it online, when to use blur or color, how square and circular outputs differ, and which export settings to choose.
How Do You Make a Square Photo or No Crop DP?
Upload your picture to a square DP maker, choose Fit mode, and use a blurred or solid-color background to fill the unused space without cropping. Keep the main photo centered, select a square output size, and download the no crop DP as PNG, JPG, or WebP for WhatsApp or Instagram.
With Viral Suite's free Square Photo Maker, the process takes three steps:
- Upload a JPG, PNG, or WebP image.
- Choose Fit, then select a blur or color background.
- Pick an export size and format, then download the square image.
The tool works in your browser, requires no signup, and adds no watermark. Your image is processed locally rather than uploaded to a server.
A no-crop square image does not remove any part of the original. It adds space around the photo until the canvas has equal width and height.
What Does a 1:1 Aspect Ratio Mean?
An aspect ratio describes the relationship between an image's width and height. A 1:1 aspect ratio means both dimensions are equal: 1080 x 1080, 720 x 720, and 512 x 512 are all square images.
Your source photo may be:
- Portrait: taller than it is wide
- Landscape: wider than it is tall
- Square: equal width and height
To turn a portrait or landscape image into a square, an editor must either remove part of the image, distort it, or add space. A no-crop result uses the third approach.
| Method | Keeps the full photo? | Keeps natural proportions? | Best for |
|---|---|---|---|
| Fit with blur | Yes | Yes | Portraits, travel photos, and full-body pictures |
| Fit with color | Yes | Yes | Logos, products, and clean profile images |
| Crop to square | No | Yes | Tight headshots and detail-focused compositions |
| Stretch to fill | Yes | No | Graphics where exact edge-to-edge coverage matters |
How to Make a Photo Square Online: Step by Step
1. Upload Your Photo
Open Viral Suite's free Square Photo Maker and drag your image into the upload area, or select it from your device.
The tool accepts JPG, PNG, and WebP images. A higher-resolution source usually gives you more flexibility when exporting a large result.
2. Choose Fit Mode to Avoid Cropping
Select Fit when you want every part of the original picture to remain visible. The tool scales the photo to fit inside a square without changing its proportions.
If the source is portrait, extra space appears on the left and right. If it is landscape, extra space appears above and below. The background controls determine how that space looks.
3. Pick a Blur or Solid-Color Background
Use Blur to fill the square with an enlarged, softened version of the same photo. This usually feels natural because the colors in the background already match the image.
Use Color when you want a cleaner or more controlled result. A neutral color can work well for business headshots, product photos, logos, and images that already have a simple visual style.
4. Center the Important Part of the Image
Keep faces, products, logos, and other important details away from the outer edges. Some apps display a square upload inside a circular frame, which can hide the corners even though the file itself is square.
If you want a tighter composition, switch to Crop mode. You can zoom with the slider, mouse wheel, or a pinch gesture and drag the photo to reposition it. Use this only when removing some of the original image is acceptable.
5. Choose the Output Shape
Use Square for a standard 1:1 image. Use Rounded for softened corners, or Circle when you want a ready-made round profile picture.
The circle option can also add an Instagram-style gradient ring. If you want transparent corners around a circular image, export it as PNG or WebP rather than JPG.
6. Select the Size and File Format
The tool includes 2160, 1080, 720, 512, and 256-pixel presets, as well as original and custom size options. Choose a size based on where the image will be used and how much detail you need.
| Output option | A practical use |
|---|---|
| 2160 x 2160 | Large, high-detail square image |
| 1080 x 1080 | General social-media posts and versatile reuse |
| 720 x 720 | Smaller downloads with good on-screen detail |
| 512 x 512 | Profile pictures, avatars, and account images |
| 256 x 256 | Small thumbnails and lightweight previews |
| Original | Preserve the maximum square size available from the source |
| Custom | Match a specific width and height requirement |
7. Preview and Download
Check that the subject is centered, the background supports the photo, and nothing important sits too close to the edges. Then choose PNG, JPG, or WebP and download the result.
For JPG and WebP, lower the quality setting when you need a smaller file. PNG is lossless and is the safest choice when you need transparency around a circle or rounded corners.
Blur Background or Color Background: Which Is Better?
Neither background is always better. The right choice depends on the image and the impression you want to create.
Use a Blur Background When:
- You want the full portrait or landscape image to remain visible
- The photo has varied colors that would be difficult to match manually
- You want the added space to feel like part of the original scene
- You are making a casual profile photo, travel image, or social post
Too much blur can compete with the subject or create a heavy halo. Adjust the blur until it fills the space without pulling attention away from the main photo.
Use a Color Background When:
- You want a clean, minimal result
- The image contains a logo, product, illustration, or headshot
- You need a background that matches a brand palette
- The blurred version looks visually busy
Choose a color already present in the photo, or use a quiet neutral such as white, off-white, gray, or a dark tone with enough contrast around the subject.
Fit, Crop, or Stretch: Which Mode Should You Use?
The three modes solve different problems.
Fit: Keep Everything
Fit is the correct choice when the goal is square without crop. It preserves the full image and its natural proportions, then fills the remaining square area with blur or color.
Crop: Fill the Square Naturally
Crop fills the entire square while keeping the photo's proportions. Some content outside the square is removed. Use zoom and pan to decide exactly what remains visible.
This works well for close-up portraits, food photos, product details, and images where the surroundings are not essential.
Stretch: Keep Everything Edge to Edge
Stretch forces the entire picture to fill the square. Nothing is removed, but the image's proportions change. People and circular objects may look unnaturally wide or narrow, so this mode is usually more suitable for abstract graphics than photographs.
Use Fit when preserving the complete photo matters, Crop when composition matters more than the edges, and Stretch only when distortion is acceptable.
How to Make a No Crop DP for WhatsApp
To make a full-size WhatsApp DP without cropping, create the square version before selecting it in WhatsApp. Choose Fit, use blur or color to fill the extra space, and keep the face or main subject near the center. This gives you a WhatsApp DP full-size composition without stretching the original picture.
After downloading the result, follow the official WhatsApp instructions for uploading or changing a profile photo. Leave comfortable space around the subject so it remains clear when displayed at a small size. The Square Photo Maker also offers a circle output when you want to preview and export that shape directly.
How to Make a No Crop DP for Instagram
For an Instagram profile picture or square post, place the complete photo inside a 1:1 canvas and fill the surrounding space. This works as an Insta full DP maker workflow because the complete portrait or landscape image remains visible. If you plan to use the result in a circular presentation, center the most important detail.
Meta's Instagram image-resolution guidance explains how an uploaded photo's width and aspect ratio affect processing. For a square feed image, 1080 x 1080 is a practical export choice. If the source is small, exporting at a larger size cannot create missing detail, so use the original-resolution option when appropriate.
If you want a ready-made circular avatar, select Circle, adjust the framing, optionally enable the gradient ring, and export as PNG to keep transparent corners.
PNG, JPG, or WebP: What Should You Download?
| Format | Choose it when | Important detail |
|---|---|---|
| PNG | You need transparency or crisp lossless output | Files can be larger |
| JPG | You want a widely compatible photo file | Transparent areas become a solid background |
| WebP | You want strong compression with modern image quality | Very old software may not support it |
For an ordinary square photograph, JPG or WebP is often convenient. For a circle, rounded corners, a logo, or any design with transparency, choose PNG or WebP.
Common Mistakes When Making a Picture Square
Using crop mode when you want the full photo
Crop mode fills the square by removing content outside it. Choose Fit if nothing should be cut away.
Placing the subject too close to an edge
A platform's circular profile preview may hide the square image's corners. Leave breathing room around faces, logos, and products.
Stretching a portrait without checking proportions
Stretch mode keeps every pixel but changes the image's shape. Look closely at faces, text, circles, and straight lines before downloading.
Choosing JPG when you need transparent corners
JPG does not support transparency. Use PNG or WebP for circular and rounded images with transparent outer areas.
Exporting a small source at a very large size
Increasing the output dimensions does not restore detail missing from the original. Start with the sharpest source available and inspect the preview before downloading.
Use Viral Suite's Free Square Photo Maker
Viral Suite's free Square Photo Maker combines the main workflows in one browser-based tool:
- Fit the full photo with a blur or color background
- Crop with zoom and drag controls
- Stretch an image edge to edge
- Export square, rounded, or circular pictures
- Add an Instagram-style gradient ring to circle photos
- Resize with presets or custom dimensions
- Convert to PNG, JPG, or WebP
- Adjust JPG and WebP quality to reduce file size
- Process the image locally in your browser
- Download without signup or a watermark
Quick Checklist for a Better Square Photo
- Start with the highest-quality source you have.
- Choose Fit if you need the complete photo.
- Compare blur and color backgrounds.
- Keep the subject centered for circular previews.
- Use Crop only when trimming the edges is acceptable.
- Choose PNG or WebP when transparency matters.
- Preview the result at a small size before downloading.
Serving Creators Since February 2026
Viral Suite's Square Photo Maker has been serving users since February 2026. The original social posts below document the tool's early rollout and the same simple promise it delivers today: turn a portrait or landscape photo into a square image without sacrificing the full picture.
Instagram Announcement
If the embed is unavailable in your browser, you can view the original Square Photo Maker announcement on Instagram.
LinkedIn Announcement
If the embed is unavailable, view the original Square Photo Maker announcement on LinkedIn.
Final Takeaway
The simplest way to make a picture square without cropping is to fit the complete image inside a 1:1 canvas and fill the unused space with blur or color. This preserves the original composition and creates a file that is easier to use for profile pictures, DPs, and square social posts.
Use Fit to keep everything, Crop for a tighter composition, and Stretch only when changed proportions will not matter. When you are ready, open the free Square Photo Maker, upload your image, and download a square result without signup or a watermark.